
When I bought my first CNC machine, I spent every dollar on the machine itself. Then I realized I needed cutting tools, workholding, measurement tools, and safety equipment — and I had nothing left in the budget. The machine is only half the investment. The tools around it are the other half, and they determine whether you make good parts or frustrating ones.
This guide covers every tool and accessory you actually need, organized by priority, with real 2026 prices. I have organized them into three stages so you can buy what you need as your budget allows and your projects demand more capability.
Stage 1: Minimum Viable Setup ($400–$700)
These are the tools you need before you make your first cut. Without these, you cannot set up the machine, hold a workpiece, or measure the result.
Tool Holding
| Item | Price | Why You Need It |
|---|---|---|
| ER collet set (1/8“ to 1/2“) | $40–$80 | Holds your cutting tools in the spindle |
| Collet wrench set | $15–$25 | Tighten and loosen collet nuts properly |
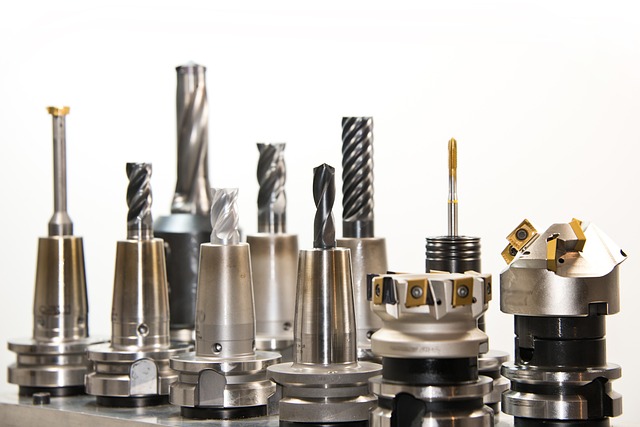
| R8 or BT30 tool holder | $30–$50 | Adapter between spindle taper and collet |
The most common mistake beginners make is buying cheap collets. A poor-quality collet has excessive runout, which means your tool wobbles instead of running true. This causes poor surface finish, broken tools, and inaccurate parts. Buy name-brand collets from brands like MariTool, ER Collet, or Lyndex-Nikken if your budget allows. At minimum, avoid the $10 Amazon specials.
Cutting Tools (Starter Set)
| Item | Price | Purpose |
|---|---|---|
| 1/4“ 2-flute upcut carbide end mill | $8–$15 | General wood cutting — your workhorse bit |
| 1/4“ 2-flute downcut carbide end mill | $8–$15 | Clean top surface for signs |
| 1/4“ compression bit | $15–$25 | Clean edges on plywood both sides |
| 1/8“ single-flute upcut | $8–$12 | Acrylic and plastics |
| 1/4“ ballnose | $10–$18 | 3D carving |
| 90° V-bit | $10–$15 | Engraving and lettering |
| Starter total | $60–$100 |
These six bits handle 90% of beginner projects. Buy them individually from a reputable brand (Amana, Whiteside, SpeTool) rather than in a multi-pack. Multi-pack bits use lower-grade carbide and dull significantly faster.
Workholding
| Item | Price | Why You Need It |
|---|---|---|
| Precision vise (4“ or 6“) | $80–$150 | Holds rectangular parts for machining |
| T-track clamping kit | $40–$80 | Holds odd-shaped parts and large pieces |
| Spoilboard / wasteboard | $10–$20 | Sacrificial surface protects your machine table |
| Total | $130–$250 |
Do not skip the spoilboard. Your first job on a new CNC router should be surfacing the spoilboard flat. This ensures that when you tell the machine to go to Z0, the tool is actually at the top of the material across the entire work area. A warped or uneven spoilboard is the most common source of inconsistent cut depth across a workpiece — surfacing it before every major project eliminates this variable entirely and costs only a few minutes of cutting time.
Measurement
| Item | Price | Why You Need It |
|---|---|---|
| 6“ digital caliper | $25–$40 | Measure part dimensions to 0.001“ |
| Edge finder (mechanical) | $10–$20 | Locate workpiece edges for setting X/Y zero |
| Z-height touch plate | $15–$30 | Quickly set tool length offsets |
| Total | $50–$90 |
Safety
| Item | Price | Why You Need It |
|---|---|---|
| ANSI Z87.1 safety glasses | $10–$20 | Protect eyes from flying chips and debris |
| Hearing protection (NRR 25+) | $15–$30 | CNC spindle noise causes permanent hearing loss |
| N95 dust mask or respirator | $10–$20 | Fine dust damages lungs — especially MDF |
| Fire extinguisher (CO2) | $40–$60 | Class C rated for electrical/ machine fires |
| Total | $75–$130 |
Stage 1 Total: $400–$700
Stage 2: Quality of Life Upgrades ($400–$900)
Upgrade Tools
Once you have machined a few parts, you will quickly feel the limitations of the minimum setup. These tools make setups faster, parts more accurate, and the work more enjoyable.
| Item | Price | What It Does |
|---|---|---|
| Dial test indicator + magnetic base | $50–$120 | Tram the vise, check spindle runout, align workholding |
| Outside micrometer set (0-3“) | $80–$150 | Measure to 0.0001“ for precision work |
| Deburring tool + machinist stone | $15–$30 | Remove sharp edges from finished parts |
| Mist coolant system | $50–$100 | Extends tool life on aluminum, improves finish |
| Dust collection (shop vac + cyclone) | $100–$200 | Essential for router — wood dust is a fire hazard |
| Additional collets (1/8, 3/16, 3/8) | $30–$50 | More size options without changing collets |
| Extra end mills (replacement + sizes) | $40–$80 | You will break bits. Have spares ready. |
| Total | $400–$900 |
Key Purchase
The dial test indicator is the single most important quality-of-life tool. Before I owned one, I assumed my vise was square. It was not. After indicating it in, my parts started fitting together properly for the first time.
Stage 3: Advanced Setup ($600–$1,600)
Precision Tools
These tools are for when you start making parts that demand higher precision, or when you want to speed up repeat setups.
When to Upgrade
Move to Stage 3 when your parts require measured hole diameters, threaded holes, or repeatability within ±0.001“. Before then, Stage 1 and 2 tools cover most hobby work.
| Item | Price | What It Does |
|---|---|---|
| Bore gauge | $100–$200 | Measure hole diameters precisely |
| Tool presetter | $200–$400 | Measure tools offline — saves spindle time |
| 1-2-3 blocks (pair) | $20–$40 | Setup blocks for quick work positioning |
| Parallel set | $30–$60 | Support workpieces above vise jaws |
| Tap holder + tap set | $100–$300 | Thread holes on the machine |
| Gauge block set | $150–$600 | Calibrate measurement tools |
| Total | $600–$1,600 |
Complete Budget Overview
Total Investment
| Stage | Items | Cost Range |
|---|---|---|
| Stage 1 | Minimum viable — collets, bits, workholding, measurement, safety | $400–$700 |
| Stage 2 | Quality of life — indicator, coolant, dust collection, deburring | $400–$900 |
| Stage 3 | Advanced — bore gauge, presetter, taps, gauge blocks | $600–$1,600 |
| Total | Complete well-equipped shop | $1,500–$3,000 |
Recommended Order
The machine itself plus Stage 1 tools is a fully functional setup. Stages 2 and 3 add capability as your projects demand them. Do not feel pressured to buy everything at once.
My First-Year Spending Mistake
When I started, I bought the cheapest possible collet set — a $15 set of eight ER collets from Amazon. The runout was so bad that my 1/4“ end mill cut a 0.260“ wide slot instead of 0.250“. Every part I made was wrong by 0.010“, and I could not figure out why.
I spent three weeks chasing the problem — checking my CAM setup, calibrating the machine, adjusting feeds and speeds. Nothing helped. Finally, I borrowed a friend’s name-brand collet, and the slot came out perfectly at 0.250“.
The Lesson
Cheap collets are the most expensive purchase you can make. They hide as savings but cost hours of troubleshooting and scrap parts. Buy quality collets once.
Software Costs — The Often-Forgotten Line Item
Your CNC machine needs software to design parts and generate toolpaths. While there are free options, understanding what each tier costs helps you budget realistically.
| Software | Cost | Best For |
|---|---|---|
| Fusion 360 (hobbyist) | Free | Full CAD/CAM, parametric design, 3D toolpaths |
| Carbide Create | Free | Simple 2D designs for Shapeoko users |
| VCarve Desktop | $349 one-time | 2D/2.5D woodworking, signs, joinery |
| VCarve Pro | $699 one-time | Advanced toolpaths, nesting, larger files |
| Aspire | $1,999 one-time | 3D carving, relief modeling, full-featured |
| Easel (Inventables) | Free (basic) | Browser-based, beginner-friendly, X-Carve users |
Start with Fusion 360’s free hobbyist license. It is the most capable free option and the skills transfer to professional CAM software. If you find Fusion 360 too complex for simple 2D work, add VCarve Desktop.
Consumables Budget
Plan for these ongoing costs. They are not one-time purchases:
| Item | Frequency | Cost per Year |
|---|---|---|
| End mill replacement | Every 10-40 hours of cutting | $50–$150 |
| Collet replacement | Every 6-12 months | $20–$40 |
| Coolant / lubricant | Every 2-4 months | $30–$60 |
| Practice material | Monthly | $100–$300 |
| Tape, adhesive, fixtures | Monthly | $30–$60 |
| Total annual consumables | $230–$610 |
Setting Up Your Workspace
How you organize your CNC workspace affects safety, productivity, and part quality more than most beginners realize.
Floor Plan and Machine Position
Place your CNC machine on a level concrete floor if possible. Wooden floors in garages or workshops can flex under the machine weight, causing the machine frame to twist slightly and affecting accuracy. If you must use a wooden floor, place a 3/4“ plywood sheet under the machine to distribute the load, and level the machine with adjustable feet or shims before tightening everything down.
Leave at least 3 feet of clearance on all sides of the machine for material loading, chip clearing, and emergency access. The spindle side (typically the front) needs the most room for loading large sheets of material. Plan your electrical outlet location so the power cord reaches without stretching — a taut cord can pull on the controller and cause intermittent connection issues.
Lighting Requirements
Good lighting is one of the cheapest quality improvements you can make. CNC machines produce fine chips and dust that make it hard to see what is happening during a cut. Install a dedicated work light above the machine, preferably LED with a color temperature of 4000-5000K (neutral white). Position the light so it illuminates the cutting area without casting shadows from the gantry. A flexible LED gooseneck lamp mounted to the machine frame costs under $30 and dramatically improves your ability to spot problems during cutting.
Storage and Organization
A pegboard or tool rack near the machine keeps frequently used tools within arm’s reach. Store collets, wrenches, calipers, and edge finders on the pegboard. End mills belong in a dedicated holder or labeled case — never loose in a drawer where they chip each other. Organize bits by size and type so you can find the right tool without searching.
Dust Collection Setup
Your dust collection system should be the first accessory you set up, not an afterthought. Position the dust collector or shop vac outside your work area or in a sound-dampened enclosure if possible — the noise adds to the machine noise and creates an unpleasant work environment. Run the dust hose overhead with a retractable reel rather than across the floor where it creates a tripping hazard and catches on material sheets.
The dust shoe (the attachment that surrounds the bit) should have soft bristles that conform to the workpiece surface and a clear plastic body so you can see the cut. A poor dust shoe that does not seal against the material leaves dust on the part and in the air, defeating the purpose of the system.
Troubleshooting Common Setup Issues
Problem-Solution Table
| Problem | Likely Cause | Solution |
|---|---|---|
| Parts not fitting together | Machine not trammed or vise not square | Tram the spindle to the table, indicate the vise parallel to X-axis |
| Inconsistent cut depth across part | Spoilboard not surfaced | Surface spoilboard with fly cutter or large end mill |
| Tool pulls out during cut | Worn collet, wrong collet size, or insufficient tightening | Replace collet, verify shank matches collet, tighten with proper wrenches |
| Machine loses position mid-cut | Loose cable connection, missed steps from aggressive cut | Check all cable connections, reduce feed rate or depth of cut |
| Poor surface finish on one axis only | Axis out of tram or loose linear bearing | Check tram in both X and Y, tighten bearing trucks or gibs |
| Spindle not reaching full RPM | VFD parameter error or incorrect voltage setting | Verify VFD parameters match spindle specifications, check input voltage |
| Workpiece moves during cut | Insufficient clamping or wrong workholding method | Add more clamps, use double-sided tape, or switch to vacuum table |
| CAM simulation looks wrong | Wrong post-processor selected | Verify post-processor matches your machine controller |
Prevention Tips
Prevent most setup issues by buying quality collets, indicating your vise, and surfacing your spoilboard before every major project. Always run a dry run before cutting.
Priority Decision Flowchart
What to Buy First
flowchart TD
    A[Just bought a CNC machine] --> B{Do you have?}
    B --> C{Collets and<br>at least 3 end mills?}
    B --> D{Vise or clamps?}
    B --> E{Digital caliper?}
    B --> F{Safety glasses &<br>hearing protection?}
    C -->|No| G[Buy ER collet set + starter bits — $100]
    D -->|No| H[Buy vise or T-track kit — $100]
    E -->|No| I[Buy 6\" digital caliper — $30]
    F -->|No| J[Buy PPE — $50]
    G --> K[✅ Ready to cut]
    H --> K
    I --> K
    J --> K
    K --> L{First 10 parts done?}
    L -->|Yes| M[Add dial indicator + dust collection]
How to Use It
Start at the top and answer each question honestly. Buy only the items marked “No” before making your first cut. After 10 parts, add the indicator and dust collection.
FAQ
Common Questions
How much should I budget for CNC tools beyond the machine?
Budget an additional 30-50% of the machine price for essential tools and accessories. For a $2,000 machine, expect to spend $600-$1,000 on tooling, workholding, measurement, and safety equipment.
What is the most important tool I need besides the CNC machine?
A quality ER collet set and a digital caliper. The collet set holds your cutting tools securely, and the caliper lets you measure parts to verify dimensions. Without these, you cannot make accurate parts.
Do I need a dust collector for a CNC router?
Yes. Dust collection is not optional for CNC routers. Wood dust is a fire hazard, MDF dust contains formaldehyde, and fine particles damage your lungs. A shop vac with a cyclone separator is the minimum acceptable setup.
What measuring tools do I need as a beginner?
Start with a 6-inch digital caliper ($25-$40) and an edge finder ($10-$20). Add a dial indicator with magnetic base ($50-$80) when you need to tram the vise and check runout.
Can I use a CNC mill without coolant?
Yes for wood and plastics. For occasional aluminum cuts, WD-40 or mist coolant applied manually is sufficient. Full flood coolant is only needed for production steel or stainless work.
Key Takeaway
Budget 30-50% of machine price for tools and accessories. Buy quality collets first — they affect every cut. Add tools in stages as your projects demand them.
Related Guides
Essential Reading
- CNC Machine Buying Guide 2026 — Choose the right machine first
- CNC Router Bits Guide — Which bits to buy for your projects
- CNC Safety Guide — Essential safety before you start cutting
- CNC Workholding 101 — How to hold your parts
Next Steps
Start with Stage 1 tools before making your first cut. Add Stage 2 tools after you have machined your first 10 parts. Upgrade to Stage 3 only when your projects demand higher precision or faster setups.
 CNC Spindle Guide: Types, Power, Cooling, and How to ChooseJune 26, 2026 · Guides
 CNC Shop Space Requirements Guide: Electrical, Dust, and Noise ConsiderationsJune 27, 2026 · Guides
 CNC End Mill Coatings Guide: TiN, TiAlN, AlTiN, and DLC ExplainedJune 27, 2026 · Guides
 CNC Tool Holding Systems Guide: ER Collets, BT30, and Chuck Types ExplainedJune 27, 2026 · Guides