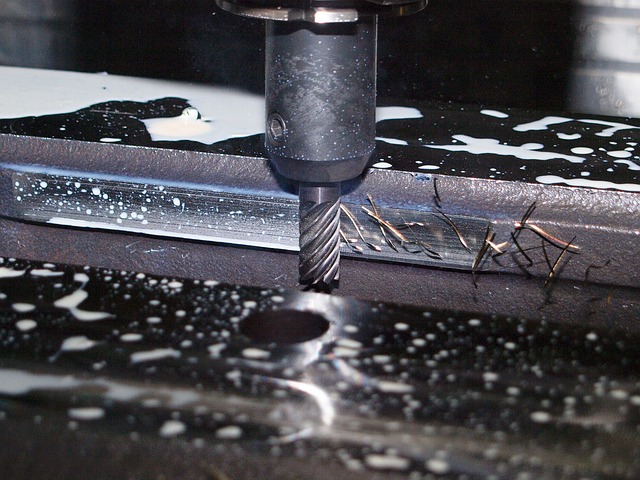
G-Code for Beginners: Learn to Write Your First CNC Program
G-code is the language you use to tell a CNC machine where to move, how fast, and what path to follow. If you can write a set of coordinates on a piece of paper, you can learn G-code. It is not as complicated as it looks.
A G-code program is just a list of instructions. The machine reads them one line at a time from top to bottom. Each line tells the machine to do one thing — move to a position, start the spindle, or change a tool.
This guide takes you from knowing nothing about G-code to writing and understanding your first complete CNC program. You will learn the 9 essential codes, how coordinates work, and exactly what each line of your first program does. No prior experience needed.
What is G-Code in One Sentence
G-code (Geometric code) is a list of coordinates and commands that a CNC machine follows to cut a part. It was developed in the 1950s at MIT and has been the standard language for machine tools ever since.
flowchart LR
    A[CAD Model] --> B[CAM Software]
    B --> C[G-Code Program]
    C --> D[CNC Machine]
    D --> E[Finished Part]
    C -.-> F[Simulator<br>Safe testing]
    F -.-> C
    style C stroke:#006ba1,stroke-width:3
Every line of G-code follows the same simple structure:
G01 X100 Y50 F200| Part | What it means | Example |
|---|---|---|
| G-code word | What to do | G01 = move in a straight line |
| Coordinate words | Where to go | X100 = go to X position 100 |
| Feed rate word | How fast | F200 = move at 200 mm per minute |
The machine reads these instructions one line at a time, starting from the top, and executes them in order until it reaches the end. This is called sequential execution and it is the most important concept to understand — the machine does exactly what you write, in exactly the order you write it, with no interpretation or guesswork.
Before You Write Code: Understanding CNC Coordinates
Before you can tell a machine where to go, you need to understand how it measures position. CNC machines use a coordinate system just like the one you learned in math class.
Machine Zero vs Workpiece Zero
Every CNC machine has a fixed machine zero — this is a permanent reference point built into the machine by the manufacturer. You rarely program using this position directly.
Instead, you set a workpiece zero (also called part zero or program zero) using a work offset like G54. This tells the machine where your part is located on the table. Once set, you program all your coordinates relative to this zero point.
Machine zero (permanent)     Workpiece zero (you set this)
         │                              │
         ▼                              ▼
    ┌──────────┐                  ┌──────────┐
    │ Machine  │                  │  Part    │
    │ table    │     G54          │  zero    │
    │ corner   │ ───────────►    │ here     │
    └──────────┘                  └──────────┘
    Fixed by factory             You choose this
Why this matters: You can move the part to a different spot on the table, update the work offset, and your program still works. You never have to rewrite the coordinates.
The Three Axes
CNC machines move along three main axes:
| Axis | Direction | Machine Movement |
|---|---|---|
| X | Left / Right | Table moves left and right |
| Y | Front / Back | Table moves toward and away from you |
| Z | Up / Down | Spindle moves up and down |
Positive X moves the tool to the right. Positive Y moves the tool to the back of the machine. Positive Z moves the tool upward.
Here is a practical way to think about it: stand in front of the machine facing the table. Your left hand is the negative X direction. Your right hand is positive X. Pushing your hand away from you is positive Y. Pulling it toward you is negative Y. Reaching up is positive Z.
Most CNC programs use all three axes in sequence. The tool starts above the part (positive Z), drops down into the material (negative Z), moves across the surface cutting material (X and Y), then retracts back up. Understanding this up-down-across rhythm makes reading any G-code program intuitive.
Absolute vs Incremental Positioning
Every move you program is interpreted in one of two ways:
Absolute mode (G90): Coordinates are measured from the workpiece zero point.
G90 G01 X50 F200 ; Move TO position X=50, regardless of where the tool isIncremental mode (G91): Coordinates are measured from the current tool position.
G91 G01 X50 F200 ; Move +50mm from wherever the tool currently isFor your first programs always use G90 (absolute mode). It is safer and easier to debug. If one coordinate is wrong only that position is wrong. In G91 one wrong coordinate shifts everything.
The 9 G-Codes You Need to Start
You do not need to memorize 100 codes. You can write real CNC programs with just 9 commands:
| Code | What it does | Example |
|---|---|---|
| G01 | Straight line cut at a controlled speed | G01 X100 F200 |
| F | Set the feed rate (how fast to cut) | F200 = 200 mm/min |
| S | Set the spindle speed (RPM) | S3000 = 3000 RPM |
| M03 | Start the spindle clockwise | M03 S3000 |
| M05 | Stop the spindle | M05 |
| M06 | Change the tool | M06 T1 |
| M08 | Turn coolant on | M08 |
| M09 | Turn coolant off | M09 |
| G83 | Peck drill a deep hole | G83 R2 Z-25 Q5 F120 |
These 9 codes handle spindle control, tool changes, cutting moves, and drilling. Everything else is a variation or refinement of these.
How to Read a G-Code Line
Every G-code line follows the same pattern. Once you learn to read it you can understand any program:
N10 G01 X100 Y50 Z-2 F200 S3000 M08Breaking it down from left to right:
| Part | Value | Meaning |
|---|---|---|
| Line number | N10 | Optional label for reference |
| Motion code | G01 | Linear feed move |
| X coordinate | X100 | Go to X position 100 |
| Y coordinate | Y50 | Go to Y position 50 |
| Z coordinate | Z-2 | Go to Z position -2 (2mm below zero) |
| Feed rate | F200 | Move at 200 mm/min |
| Spindle speed | S3000 | Run at 3000 RPM |
| M code | M08 | Turn on coolant |
Not every line needs all of these values. Once you set a feed rate with F200 it stays active until you change it. The same applies to spindle speed. You only write them when they need to be different from the current value.
Your First CNC Program: Step by Step
Let us write a complete program together. The task: cut a 50mm square pocket, 2mm deep, in a piece of aluminum.
We will go through it line by line so you understand exactly what each instruction does.
Step 1: The Safety Block
Every CNC program should start with a safety block. This explicitly sets the machine to a known state so there are no surprises:
G90 G94 G17 G54| Code | What it does |
|---|---|
| G90 | Absolute positioning mode |
| G94 | Feed rate in mm per minute |
| G17 | XY plane (standard for milling) |
| G54 | Use work offset 1 (your part zero) |
Step 2: Tool Change and Spindle Start
Next we select the cutting tool and start the spindle:
M06 T1            ; Change to tool 1 (6mm end mill)
M03 S3000         ; Start spindle at 3000 RPM
The machine stops, waits for you to load tool 1, then starts the spindle spinning at 3000 RPM.
Step 3: Position Over the Part
Now move the tool to where the cutting starts. We use G00 (rapid speed) because the tool is not cutting yet:
G00 X0 Y0 Z5 ; Move above the part zero, 5mm clearanceThe tool moves to X=0, Y=0 (your part zero) at Z=5 (5mm above the surface). The tool is above the part and ready to plunge.
Step 4: Plunge and Cut
Now the cutting begins:
G01 Z-2 F100      ; Plunge 2mm deep at 100 mm/min
G01 X50 F200      ; Cut to X=50 at feed rate 200
G01 Y50           ; Cut to Y=50
G01 X0            ; Cut back to X=0
G01 Y0            ; Cut back to Y=0
Each line moves the tool in a straight line while cutting. The first plunge goes slow (F100). The horizontal cuts are faster (F200).
Step 5: Retract and Finish
After cutting, retract the tool and shut everything down:
G00 Z5            ; Rapid retract to Z5 (above the part)
M05               ; Stop the spindle
M09               ; Turn off coolant
M30               ; End of program — rewinds to start
The Complete Program
Here is the entire program in one block:
%
O0001 (FIRST SQUARE POCKET)
N10 G90 G94 G17 G54   ; Safety block
N20 G21               ; Metric mode (mm)
N30 M06 T1            ; Tool change to 6mm end mill
N40 M03 S3000         ; Spindle on, 3000 RPM
N50 G00 X0 Y0 Z5      ; Rapid to start position
N60 G01 Z-2 F100      ; Plunge 2mm deep
N70 G01 X50 F200      ; Cut to X=50
N80 G01 Y50           ; Cut to Y=50
N90 G01 X0            ; Cut to X=0
N100 G01 Y0           ; Cut to Y=0
N110 G00 Z5           ; Retract
N120 M05              ; Spindle off
N130 M30              ; Program end
%
Every line is numbered (N10, N20, etc.) and commented for clarity. When you run this program the machine will cut a 50mm square, 2mm deep, centered on your part zero.
How to Run It Safely
Before running any program on a real machine:
- Check the tool — Is the correct tool loaded? Is it secure?
- Check the work offset — Does G54 point to the correct part zero?
- Run a dry run — Raise Z to 50mm and run the program. Watch the toolpath. Does it look right?
- Single block mode — Run the program one line at a time. Check each move before pressing cycle start.
- First cut — Watch the first cut carefully. Listen for unusual sounds. Check the first pass before letting it run unattended.
Common Beginner Mistakes (and How to Avoid Them)
Mistake 1: Missing Safety Block
; ❌ Starting without a safety block
M06 T1
M03 S3000
G00 X0 Y0
; What if the previous program left G91 active?
; Your "X0 Y0" move goes to who-knows-where
Fix: Always start with G90 G94 G17 G54. It takes one line and prevents hours of debugging.
Mistake 2: Wrong Feed Rate
G01 Z-2 F500      ; ❌ Too fast for plunging into aluminum
G01 X50 F50       ; ❌ Too slow for a straight cut in aluminum
Fix: Plunge at 50-100 mm/min for aluminum. Cut at 200-400 mm/min with a 6mm end mill. When in doubt start slower.
Mistake 3: Cutting with G00
G00 Z-2           ; ❌ G00 ignores the feed rate set
                  ; This moves at maximum machine speed into the material
Fix: Never use G00 when the tool is in contact with material. Use G01 for any move that cuts.
Mistake 4: Forcing the Wrong Toolpath
New programmers often try to cut the entire shape in one pass. Deep cuts cause chatter, broken tools, and poor surface finish.
Fix: Take multiple shallow passes. For example if you need to go 6mm deep, do three passes of 2mm each:
G01 Z-2 F100      ; Pass 1: 2mm deep
G00 Z5
G00 X0 Y0
G01 Z-4 F100      ; Pass 2: 4mm deep
G00 Z5
G00 X0 Y0
G01 Z-6 F100      ; Pass 3: 6mm deep
More passes take longer but the result is better and the risk of breaking a tool is much lower.
G-Code Simulators: Practice Without Risk
Before you run your program on a real machine test it on a simulator. Simulators let you see the exact toolpath your program creates without risking a crash.
Free simulators to try:
| Simulator | Platform | Best For |
|---|---|---|
| NCViewer | Web browser | Quick visual check, no install needed |
| CNC Simulator Pro | Windows | Full machine simulation |
| Camotics | Windows/Mac/Linux | Open-source 3D simulation |
| G-Wizard Editor | Windows | G-code editing + simulation + backplot |
The workflow is simple: paste your G-code into the simulator, run it, and watch the toolpath. If the tool goes somewhere unexpected, you have a bug to fix before the program touches a real machine.
Frequently Asked Questions
Is G-code hard to learn?
No. Most people understand the basics in an afternoon. The 9 codes in this guide cover what you will use 90% of the time. The real skill is not memorizing codes — it is understanding how to break down a machining task into a sequence of moves.
Do I need a CNC machine to practice?
No. Free simulators let you write and test G-code on your computer. You can learn the entire language without ever turning on a real machine.
What is the difference between G-code and M-code?
G-code controls motion — where the tool goes and what path it follows. M-code controls the machine — spindle on and off, coolant, tool changes. You use both together in every program.
How long does it take to learn G-code?
You can write a simple program after one session of about an hour. Most beginners are comfortable reading and modifying existing programs after a few days of practice. Becoming fluent enough to program complex parts from scratch without referencing a guide takes regular practice over several weeks.
The key is consistency: write one small program every day for the first week. By day seven the basic structure will feel automatic.
What kind of parts can I make with G-code?
With the 9 codes in this guide you can already make square pockets, rectangular slots, drilled hole patterns, and simple contours. Adding G02 and G03 (circular interpolation) lets you cut arcs and circles. Adding canned cycles (G81, G83) gives you efficient drilling.
Every complex part is just many simple moves combined. A turbine blade is thousands of tiny G01 moves. A engine block is hundreds of drilling cycles. The same 9 codes are the foundation for all of them.
What’s Next?
Now that you understand G-code basics, dive deeper into each concept:
 G-Code Explained: How CNC Programming WorksJune 25, 2026 · Tutorials
 G00 and G01: Rapid Traverse and Linear InterpolationJune 25, 2026 · Tutorials
 G90 vs G91: Absolute vs Incremental Positioning in CNCJune 25, 2026 · Tutorials
 CNC Conversational Programming Guide: A Beginner's IntroductionJune 27, 2026 · Tutorials