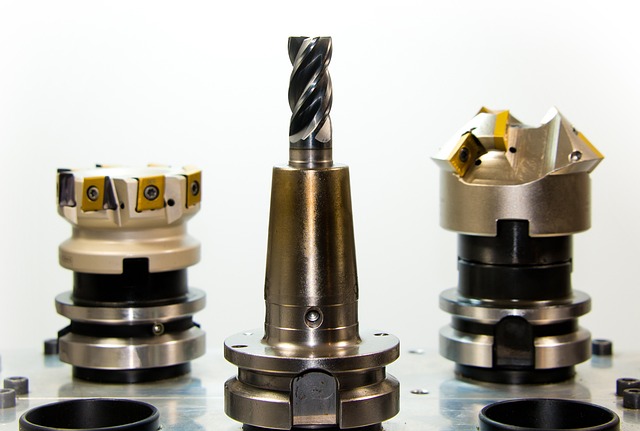
When a CNC part comes out wrong, the first question is whether the problem is the machine or the program. Diagnostic test cuts answer that question by testing individual aspects of machine performance in isolation. A test cut for squareness tells you if the axes are perpendicular. A test cut for backlash tells you if the drive train has lost motion. A test cut for tram tells you if the spindle is aligned.
I keep a set of diagnostic G-code programs on a USB drive in my shop. When something goes wrong, I run the relevant test and the result tells me where to look. The tests take five minutes each and they have saved me hours of aimless troubleshooting.
This guide covers the essential diagnostic test cuts every CNC owner should know: squareness, backlash, tram, axis scaling, and circle accuracy.
The Squareness Test
How to Test Squareness
Squareness measures whether the X and Y axes are perpendicular to each other. An axis that is out of square produces parts with angled features. A rectangular pocket will measure 90 degrees at one corner and 89.5 degrees at the opposite corner.
The test requires a piece of flat material and a tool with a known diameter. Cut a rectangular pocket about 2 inches wide by 4 inches long. Use a finish pass with a light radial cut of 0.010 inches to ensure accuracy. Measure the four corners with a precision square or protractor. Digital protractors give the most accurate reading.
Interpreting and Fixing Results
If all four corners are 90 degrees, the axes are square. If the corners measure alternately 89.5 and 90.5 degrees, the axes are out of square by 0.5 degrees.
On a gantry router, squareness is adjusted by loosening the gantry mounting bolts and squaring the gantry to the frame. Measure from a reference edge to both ends of the gantry. The distance should be equal within 0.005 inches. On a mill, squareness is a function of the machine’s construction and may not be adjustable without scraping or shimming the column. Record the measurement and adjustment made. Squareness should be checked after moving the machine or after a crash.
The Backlash Test
Simple Two-Pass Test
The backlash test is the same as the diagnostic test described in our CNC Backlash Detection Guide. Cut two slots in opposite directions and measure the difference. The test confirms whether backlash is present and gives a numerical value for compensation.
A simplified version uses a single pass in both directions. Cut a line from left to right using a 1/4 inch end mill at a depth of 0.020 inches. Without moving the Y-axis, cut another line from right to left immediately below the first. Measure the gap between the two lines with a magnifying glass and scale. The gap equals the backlash on the X-axis.
When to Run This Test
This test is fast enough to run before every critical job. If the gap is larger than your acceptable tolerance, compensate with software or fix the mechanical issue before cutting the actual part. The compensation value in your controller should be set to the measured gap.
Here is a quick G-code program for the backlash test:
; X-axis backlash test
G90 G94 G17 G54
G21
M03 S5000
G00 X0 Y0 Z5
G01 Z-0.5 F100
G01 X50 F300       ; Cut forward
G00 Z5
G00 Y2             ; Step over
G01 Z-0.5 F100
G01 X0 F300        ; Cut reverse (backlash shows here)
G00 Z5
M05
M30
The Spindle Tram Test
Quick Tram Test
Spindle tram measures whether the spindle axis is perpendicular to the table surface. An untrammed spindle produces angled walls and uneven surface finishes. The full tram test using a dial indicator is described in detail in our How to Tram a CNC Spindle guide.
A quick tram test uses a single cut on a flat piece of material. Clamp a flat piece of aluminum or steel about 4 inches square. Cut a shallow pocket 2 inches wide with a large diameter end mill such as 1/2 inch or larger. Use a light finishing pass of 0.005 inches radial depth.
Reading the Results
Measure the depth at each corner of the pocket with a depth micrometer. If the depth varies by more than 0.001 inches across the pocket, the spindle is out of tram. This test takes two minutes and catches tram problems before they affect a more complex part. I run this test after any crash or when I see uneven surface finish on flat cuts.
The Axis Scaling Test
Measuring Scaling Error
Axis scaling measures whether the machine moves the correct distance for the commanded distance. A scaling error causes parts to be consistently oversized or undersized in one axis. The error is proportional to the commanded distance. A 0.1 percent scaling error produces a 0.001 inch error over 1 inch and a 0.010 inch error over 10 inches.
The test requires a known reference length. Cut a slot exactly 10 inches long in the X-axis using a 1/4 inch end mill. Make the cut in a single pass at a depth of 0.020 inches. Measure the actual length with digital calipers. The difference between the commanded length and the actual length divided by the commanded length is the scaling error.
Correcting Scaling Errors
Scaling errors are corrected by adjusting the steps-per-unit setting in the controller. Increase the value if the actual distance is shorter than commanded. Decrease the value if the actual distance is longer. The adjustment formula: new steps = old steps x (commanded distance / actual distance).
For example, if the machine is commanded to move 10 inches and moves 9.995 inches, the adjustment factor is 10 / 9.995 = 1.0005. Multiply the current steps-per-inch setting by 1.0005 to get the corrected value.
Axis Scaling Test Results Table
| Axis | Commanded | Actual | Error | Correction Factor |
|---|---|---|---|---|
| X | 10.000 | 9.998 | -0.002 | 1.0002 |
| Y | 10.000 | 10.003 | +0.003 | 0.9997 |
| Z | 5.000 | 4.997 | -0.003 | 1.0006 |
The Circle Test
Comprehensive Performance Check
The circle test is the best check of overall machine performance including backlash, scaling, and servo tuning simultaneously. Cut a circle of known diameter, typically 2 to 4 inches, using a 1/4 inch end mill. Use a finish pass with a light radial cut. Measure the diameter at multiple points around the circle using calipers.
If the circle measures consistently larger or smaller than commanded by the same amount in all directions, the tool diameter offset is incorrect. If the circle is oval with the long axis in X or Y, the scaling on one axis is different from the other. If the circle has flat spots at the quadrant points where axes reverse direction, backlash is present. If the circle has a scalloped or wavy edge, servo tuning or mechanical vibration is the issue.
Circle Test Problem Identification
| Symptom | Likely Cause |
|---|---|
| Circle is oval, long in X | X-axis scaling error |
| Circle is oval, long in Y | Y-axis scaling error |
| Flat spots at quadrant points | Backlash |
| Scalloped or wavy edge | Servo tuning or vibration |
| Consistent offset in one direction | Backlash or lost steps |
| Size error in all directions | Tool diameter offset |
The Repeatability Test
How to Test Repeatability
Repeatability measures whether the machine returns to the same position when commanded. A machine with poor repeatability cannot hold tolerance because each run produces a different result.
The test uses a dial indicator. Position the indicator against a reference surface on the table. Zero the indicator. Command the axis to move 5 inches in the positive direction, then return to the starting position. The indicator should read zero.
Evaluating Results
Repeat the test 10 times and record each reading. The maximum deviation from zero is the repeatability value for that axis. Good repeatability is under 0.0005 inches (typical for ground ballscrews). Acceptable for hobby machines with ACME lead screws is 0.001 to 0.002 inches. Poor over 0.002 inches indicates loose components, worn bearings, or lost steps.
Test repeatability on each axis separately. The Z-axis may be different because the weight of the spindle affects the drive train loading.
Surface Finish and Z-Axis Depth Tests
Surface Finish Test
Surface finish is tested by cutting a single pass at a known feed rate and measuring the result. The test confirms that the machine is producing the expected surface quality. A machine with good tram, no backlash, and rigid construction produces consistent surface finishes across the entire table.
Use a new or sharp end mill with a diameter of at least 1/2 inch. Adjust the feed rate to produce a chip load within the recommended range. The resulting surface should be uniform with no visible chatter marks. A uniform finish across the entire pass indicates the machine is working correctly.
Z-Axis Depth Verification
The Z-axis depth test verifies that the machine cuts to the programmed depth accurately. Depth errors cause pockets that are too shallow or too deep. This test is often overlooked because most beginners focus on X and Y accuracy.
Program a pocket 0.100 inches deep in a flat piece of aluminum or plastic. After cutting, measure the actual depth at multiple points across the pocket floor using a depth micrometer. The difference between the programmed and actual depth is the Z-axis error.
Z-axis errors are common on machines with belt-driven Z drives or leadscrew systems. The Z-axis weight causes backlash that is direction-dependent. Compensate by adjusting the steps-per-unit setting or by adding backlash compensation to the Z-axis.
Creating a Diagnostic Routine
Standardized Testing Sequence
Create a standardized diagnostic routine that runs all the essential tests in sequence. The routine takes about 30 minutes to complete and should be run after any machine maintenance or when part quality degrades.
Start with the surface finish test first because it is the fastest and most comprehensive indicator of machine health. The squareness test comes next because it is the most common problem on gantry routers. The tram test follows because spindle alignment affects all cuts. The backlash and scaling tests are run last because they require more setup time.
Sample Diagnostic Log
| Date | Squareness | Backlash X | Tram | Scaling Error | Notes |
|---|---|---|---|---|---|
| 2026-06-01 | 0.1 deg | 0.002 | 0.0005 | 0.01% | Baseline |
| 2026-06-15 | 0.1 deg | 0.003 | 0.0005 | 0.01% | X backlash increasing |
| 2026-06-20 | 0.1 deg | 0.002 | 0.0005 | 0.01% | Tightened X nut |
Keep a log of test results with dates. The log helps track machine condition over time and catches gradual degradation before it affects part quality. A machine that starts showing increasing backlash or scaling errors needs maintenance before a catastrophic failure occurs.
The circle test is the single most valuable diagnostic because it exercises both axes simultaneously and reveals problems that single-axis tests miss. I recommend running a circle test as your first diagnostic step whenever you notice part quality declining. A perfect circle confirms the machine is working correctly. An imperfect circle points directly to the specific problem area.
Build your own set of diagnostic G-code programs and store them where you can find them. Label each program with the test name and the date it was created. Having the test programs ready to run removes the barrier to testing when something goes wrong. I keep mine in a folder called DIAGNOSTICS on the machine’s control computer.
For more information on specific diagnostic areas, see our CNC Backlash Detection Guide, How to Tram a CNC Spindle, and CNC Machine Calibration Guide.
 How to Tram a CNC Spindle: A Beginner's Guide to Perfect Head AlignmentJune 27, 2026 · Guides
 CNC Job Setup Sheet Template: A Beginner's Guide to Organized MachiningJune 27, 2026 · Guides
 CNC Part Finishing and Deburring Guide: Methods, Tools, and Best PracticesJune 27, 2026 · Guides
 CNC Toolpath Troubleshooting Guide: Fix Bad Cuts and Improve Surface FinishJune 27, 2026 · Guides