
Turning on a CNC machine and getting it ready to cut is a sequence of steps you must follow in order. Skip one, and you risk a crash that can destroy a tool, ruin a part, or damage the machine.
I have crashed a machine twice. Both times were because I skipped a setup step. Once I forgot to home the Z-axis before running a program — the tool rapided downward into the vise instead of upward to the clearance plane. The sound of carbide hitting steel at full rapid is unforgettable.
This guide covers the complete setup sequence from power-on to first cut: homing the machine, loading tools, setting work offsets, verifying the program, and running the first part safely. Follow these steps in order every time, and you will never crash a machine due to setup error.
The 7-Step CNC Setup Sequence
flowchart LR
    A[1. Power On<br>& Home] --> B[2. Load Tools<br>& Set Offsets]
    B --> C[3. Mount<br>Workpiece]
    C --> D[4. Set<br>Part Zero]
    D --> E[5. Load &<br>Verify Program]
    E --> F[6. Dry Run<br>& Safety Checks]
    F --> G[7. First Cut<br>& Inspect]
    style G stroke:#006ba1,stroke-width:3
This sequence applies to CNC mills, routers, and machining centers. Lathes follow the same logic with minor differences in tool orientation and axis naming.
Why the Order Matters
Each step depends on the previous one. Homing must come before tool loading because the machine needs to know its position to measure tool lengths correctly. Tool offsets must be set before setting part zero because the Z-offset calculation requires the tool length. Following the sequence in order prevents crashes and ensures consistent results.
Before You Begin
Before starting the setup sequence, gather everything you need: the G-code program, cutting tools, workpiece material, and measuring tools (calipers, edge finder, feeler gauges). Having everything within reach before starting prevents having to stop mid-setup to find a missing tool.
Step 1: Power On and Home the Machine
Power-On Sequence
- Turn on main power disconnect — the large switch at the back of the machine
- Press the Power On button on the control panel
- Wait for the controller to fully boot — typically 20-60 seconds
- Release the Emergency Stop — twist clockwise to release
- Clear any alarm messages — press Reset to clear
Homing the Machine
Homing establishes Machine Zero — the fixed reference point for all axis movement. Without homing, the controller does not know where the spindle is.
| Axis | Homing Order | Why |
|---|---|---|
| Z | First | Moves spindle up to the highest safe position |
| X | Second | Moves table or column to home |
| Y | Third | Moves remaining axis to home |
The most important rule: Home Z first. If you home X or Y first, the machine might move the table with the spindle in a low position, potentially hitting a clamp or vise.
How to home:
- Select Zero Return or Home mode on the control
- Press Cycle Start or the Home button for each axis
- The machine moves each axis until it contacts the limit switch
- The controller records that position as Machine Zero
Different machines have different homing methods. Some home all axes automatically with a single button. Others require each axis to be homed individually. Check your machine manual for the specific procedure.
Step 2: Load Tools and Set Tool Offsets
Loading Tools
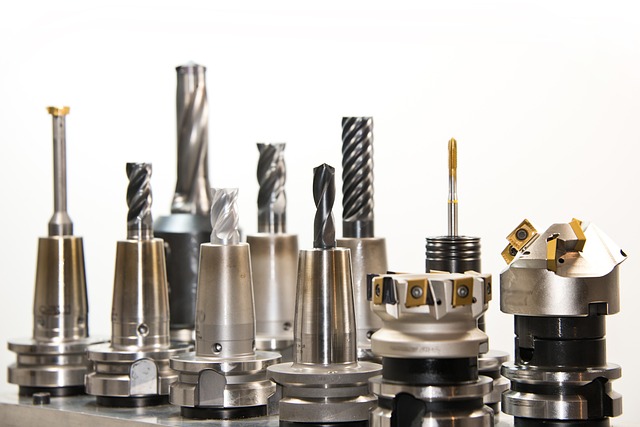
- Clean the tool holder taper — any chip or debris causes runout
- Insert the tool into the collet or holder — ensure the shank is fully seated
- Tighten the collet nut — use a wrench, not finger-tight
- Load the holder into the spindle or tool carousel
- Verify the tool number matches the program — Tool 1 in the program must be Tool 1 in the spindle
Setting Tool Length Offsets
The machine needs to know how long each tool is so it can position the tip correctly.
Manual touch-off method (most common):
- Place a piece of paper (or a feeler gauge) on top of the workpiece
- Jog the tool down until it just grips the paper when you pull it
- Subtract the paper thickness (typically 0.002-0.005“)
- Enter that Z value as the tool length offset
Using a Z-axis touch plate (recommended):
- Place the touch plate on top of the workpiece
- Jog the tool down until it contacts the plate
- The controller automatically records the tool length
- Accuracy: ±0.0002“ vs ±0.002“ for the paper method
Tool offset types:
| Offset Type | Purpose | When to Use |
|---|---|---|
| Geometry offset | Physical tool length from spindle gauge line | Set once when tool is loaded |
| Wear offset | Fine adjustment for tool wear or deflection | Adjust during production |
Repeat this process for every tool used in the program. A program calling Tool 3 without a corresponding offset for Tool 3 will crash.
Step 3: Mount the Workpiece
Workholding Method Comparison
| Workholding Method | Best For | Setup Time | Holding Force |
|---|---|---|---|
| Precision vise | Rectangular metal parts | Fast | High |
| T-track clamps | Large or odd-shaped parts | Medium | Medium |
| Vacuum table | Thin flat parts, sheet goods | Fast | Low-medium |
| Collet chuck | Round stock on lathes | Fast | High |
| Custom fixture | Complex or production parts | Slow | High |
Rules for secure workholding:
- Clamp or vise pressure should be 3-5x the expected cutting force
- Support thin parts with parallels or backing material
- Leave at least 0.5“ of clearance between clamps and the cutting path
- Indicate the vise or fixture after bolting it down — 0.001“ out of square makes every part crooked
Workholding Best Practices
Always clean the machine table and vise before mounting the workpiece. A chip under a vise jaw or workpiece causes the part to sit tilted, producing angled features. Use parallels under the workpiece for vise setups to ensure the part sits level. For thin materials, use a vacuum table or double-sided tape to prevent flexing during cutting. Verify that all clamps clear the programmed toolpath by at least 0.5 inches.
Step 4: Set Part Zero (Work Offsets)
Part Zero tells the machine where your workpiece is located relative to Machine Zero. This is set using work offset registers G54 through G59.
Setting Z Zero (Top of Material)
The Z zero is the most critical offset. Follow these steps:
- Jog the tool to approximately 0.1“ above the workpiece surface
- Place a 0.004“ feeler gauge between tool and part
- Slowly lower the tool in 0.001“ increments until the feeler gauge drags
- On the controller, navigate to the Work Offset page (typically G54)
- Enter the current Z position as Z0 (the controller calculates the offset automatically)
Setting X and Y Zero
Using an edge finder (mechanical):
- Install the edge finder in the spindle
- Spin it at 500-1000 RPM
- Slowly approach the X- side of the workpiece until the edge finder kicks (jumps off-center)
- Record that position, then move to the X+ side and repeat
- The center of those two positions is X0
- Repeat for Y
Using a probe (if equipped):
- Select the probing cycle on the controller
- Tell the controller which face to probe
- The probe touches the workpiece and sets the offset automatically
Which Work Offset to Use
| Register | When to Use |
|---|---|
| G54 | Default for the first workpiece |
| G55-G59 | Additional workpieces or multiple vises |
| G52 | Temporary shift within a program (use carefully) |
Step 5: Load and Verify the Program
- Transfer the G-code file to the machine via USB, network, or direct connection
- Load the program from the controller’s file menu
- Verify the program header — check that tool numbers, work offset (G54), and units (G20/G21) match your setup
- Review the toolpath on the controller’s graphics display if available
Critical things to check in the program header:
%                -- Program start
O0001            -- Program number
(G54 X0 Y0 Z0)   -- Work offset location
(T1 = 1/4 EM)    -- Tool list matches physical setup
T1 M06           -- First tool call
G90 G94 G17 G54  -- Safety block: absolute, IPM, XY plane, G54
S12000 M03       -- Spindle on
G00 X0 Y0        -- Move to start position
G43 Z1.0 H1      -- Tool length offset, move to clearance plane
If the program calls G55 but you have set G54, the machine will not cut where you expect.
Verifying the Toolpath Preview
Use the graphics display to verify the program visually before cutting. Most machine controllers have a graphics display that shows the toolpath. Use this to verify the program visually. Rotate the view to check clearance above clamps and vises. Look for any moves that seem to go outside the expected cutting area. A toolpath preview catches many errors that a file review misses.
Common Program Errors to Watch For
When reviewing the program, check for these common errors: the program calls G55 but you set G54 (wrong work offset), the tool numbers in the program do not match the physical tools loaded, or the units (G20 imperial vs G21 metric) do not match your setup. Any of these errors will cause the machine to cut in the wrong location.
Step 6: Dry Run and Safety Checks
This is the step that prevents crashes. Do not skip it.
Dry Run Procedure
- Raise the Z-axis so the tool clears all clamps and the workpiece by at least 2“
- Run the program with the spindle off — no material contact
- Watch the tool path from start to finish — look for:
- The tool heading toward a clamp or vise jaw
- Rapid moves that plunge unexpectedly into the material
- Wrong tool being called
- Feed rates that seem too fast or too slow
- Use Single Block mode for the first few lines of each tool
Pre-Flight Checklist
Verify each item before starting the program:
☐ Workpiece securely clamped
☐ All tools loaded with correct offsets
☐ Work offset (G54) set to correct location
☐ Tool numbers in program match physical tools
☐ Dry run completed — no clearance issues
☐ Coolant nozzle positioned at cut zone
☐ E-stop tested and working
☐ Door closed and interlock engaged
☐ No tools or debris on the machine table
Override Settings for First Cut
| Override | Setting | Reason |
|---|---|---|
| Rapid Override | 25% | Slows rapid moves to a crawl |
| Feed Override | 50% | Cuts feed rate in half for safety |
| Spindle Override | 100% | Keep full spindle speed for proper chip formation |
| Single Block | ON | Execute one line at a time |
Step 7: First Cut and Inspection
Running the First Part
- Close all machine doors
- Keep your hand on Feed Hold — not E-Stop
- Press Cycle Start
- Watch the first 10 seconds carefully — most crashes happen here
- Listen to the cut: smooth hum = good; squealing = rubbing; chatter = lack of rigidity
- Run the first part in Single Block mode — one line at a time
First Part Inspection
- Stop the machine after the program finishes
- Remove the part carefully — watch for sharp burrs
- Clean the part and measure critical dimensions with calipers
- Compare to print or model — verify all features are present and in the right location
- Make wear offset adjustments if needed:
- Outer diameter too large by 0.005“? → Enter -0.005“ in X wear offset
- Feature too shallow by 0.002“? → Enter -0.002“ in Z wear offset
Common First-Cut Problems
| Problem | Likely Cause | Fix |
|---|---|---|
| Tool not cutting | Wrong tool offset (tool too short) | Verify tool length and re-touch |
| Tool cutting air | Work offset wrong | Re-set G54 Z zero |
| Tool crashing into vise | Work offset or clearance plane wrong | Check dry run next time |
| Poor surface finish | Feed rate wrong or tool dull | Adjust feed override |
| Excessive chatter | Depth of cut too high | Reduce DOC or check workholding |
| Part moves during cut | Clamping insufficient | Check workholding before next part |
My Setup Mistake
I have been machining for 12 years. I still make setup mistakes when I rush.
My worst crash happened when I loaded a program that used G55 but had only set G54. The machine rapided to a position based on the wrong offset and drove a 1/2“ end mill directly into the vise jaw. The end mill shattered, the tool holder released from the spindle, and the workpiece was ejected from the vise.
Damage: $40 end mill, $200 vise jaw, 3 hours of cleanup and re-indicating.
Cause: I was in a hurry and skipped Step 5 (verify program header). The program called G55 and I had not set it.
Fix: I now check the program header against my setup sheet before loading any program. It takes 30 seconds and has prevented at least three similar crashes since.
The Lesson
The crash taught me that haste causes waste. Skipping a 30-second verification step cost $240 and three hours of work. Now I follow the 7-step sequence without shortcuts, every time. The sequence is not optional — it is the difference between a setup that works and one that crashes.
Tips for Faster Setup Without Sacrificing Safety
As you get comfortable with the 7-step sequence, you can speed up without skipping safety:
Use a setup sheet. Before you touch the machine, fill out a simple sheet with: program name, tool list with diameters and lengths, work offset location, workholding method, and material size. This forces you to think through the setup before you start and serves as a reference during the process.
Keep tool holders pre-assembled. Have your most common tools mounted in tool holders with measured offsets recorded. When you need one, load it and enter the known offset. This saves 5-10 minutes per tool change.
Use a consistent G54 location. If you always set X0 Y0 at the same corner of your vise, you develop muscle memory for the process. The setup becomes faster because you stop thinking about where to set zero.
Clean as you go. Wipe down the machine table and vise after every setup. A clean machine at the start of the next setup saves time and prevents errors from chips under workholding components.
Quick Reference Card
Printable Setup Checklist
Print this card and keep it next to your machine to follow during every job. Over time the steps will become automatic, but the card serves as a safety net against forgetting a step when you are in a hurry.
How to Use the Card
Laminate the card and keep it near the machine control panel. Check off each step as you complete it. For the first 10 setups, read each step aloud before performing it. After 10 setups, use the card as a checklist rather than a step-by-step guide. After 50 setups, the sequence will be automatic.
CNC SETUP — 7 STEPS
═══════════════════════════════════
1. POWER ON & HOME
   □ Main power on, controller booted
   □ E-Stop released
   □ Home: Z first, then X, then Y

2. LOAD TOOLS
   □ Tools loaded into correct stations
   □ Tool length offsets set and verified
   □ Tool numbers match program

3. MOUNT WORKPIECE
   □ Workpiece securely clamped
   □ Vise indicated (if moved)
   □ Tool path clears all clamps

4. SET PART ZERO (G54)
   □ Z zero set (top of material)
   □ X/Y zero set (edge finder or probe)
   □ G54 register confirmed

5. LOAD PROGRAM
   □ G-code loaded into controller
   □ Program header verified (tools, offset, units)
   □ Toolpath preview reviewed

6. DRY RUN
   □ Spindle off, Z raised 2"+
   □ Full path watched for clearance
   □ No issues found

7. FIRST CUT
   □ Rapid override at 25%
   □ Feed override at 50%
   □ Single Block on
   □ Hand on Feed Hold
   □ Inspect first part, adjust offsets
FAQ
Common Questions
Here are answers to the most frequently asked questions about CNC setup:
Why do I need to home my CNC machine every time I turn it on?
Homing tells the machine where its axes are in space. Without homing, the controller does not know the absolute position of the spindle or table. Running a program without homing first is the fastest way to crash a machine.
What is the difference between Machine Zero and Part Zero?
Machine Zero is the fixed reference point established during homing — set by limit switches. Part Zero (G54-G59) is where your workpiece is located relative to Machine Zero. You set Part Zero by touching off the workpiece with a tool or edge finder.
Should I use Feed Hold or E-Stop when something goes wrong?
Use Feed Hold first. It pauses the program and stops axis movement but keeps the spindle running and remembers position. You can resume from where you stopped. E-Stop kills everything and loses position — only use it for emergencies like a crash or fire.
What is a dry run and why is it important?
A dry run runs the program above the workpiece with no material and the spindle off. It lets you watch the tool path for unexpected moves, verify clearances around clamps and vises, and catch programming errors before they cause a crash.
Can I skip the dry run if I have simulated the program on my computer?
No. Computer simulation does not account for the physical setup — clamps, vise position, tool stickout length, and stock overhang. A dry run on the actual machine is the only way to verify that the tool path clears everything in the real world.
Quick Answers
The setup sequence takes 10-15 minutes once you are familiar with it. The dry run is the step beginners are most tempted to skip — do not skip it. It catches more errors than all other verification methods combined.
Related Guides
Essential Reading
Start with these related guides for more detailed information on each topic:
- CNC Machine Buying Guide 2026 — Choose the right machine
- CNC Workholding 101 — How to hold your workpiece
- CNC Safety Guide — Essential safety procedures
- Feeds and Speeds for Beginners — Calculate cutting parameters
Next Steps After Setup
Once the machine is set up and running, focus on dialing in your feeds and speeds for optimal tool life and surface finish. Use the setup sheet template from our CNC Job Setup Sheet Guide to document your settings for repeat jobs.
 CNC Workholding Options: Choosing the Right MethodJune 25, 2026 · Guides
 CNC Safety Guide: Essential Safety Rules Every Beginner Must KnowJune 26, 2026 · Guides
 CNC Coolant Selection Guide: Flood vs Mist vs MQL for MachiningJune 27, 2026 · Guides