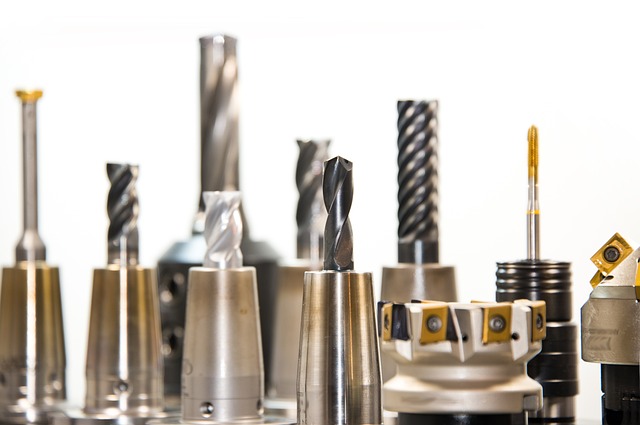
Every CNC machinist has crashed a tool, scrapped a part, or broken a workpiece. It happens to everyone. What separates experienced machinists from beginners is not the absence of mistakes but knowing how to prevent them and fix them quickly when they happen.
This guide covers the five most common reasons beginner CNC projects fail and exactly how to avoid each one.
1. The Tool Crashes Into the Workpiece
Why It Happens: Wrong Z-Zero or G00 Plunge
The Z-zero is wrong or the tool rapids down instead of feeding down. The most common cause is setting the work offset with the tool above the workpiece instead of on the surface.
Another common cause is using G00 instead of G01 to plunge into the material. G00 ignores the feed rate and moves at maximum speed. Always use G01 for any move that enters the material.
The Fix: Verify and Dry Run
Always verify Z-zero before cutting. Use a piece of paper as a feeler gauge between the tool and the workpiece. When the paper drags with light resistance, the tool is at the correct height. Then run a dry run with the Z offset raised by 50mm to verify the toolpath before cutting anything.
2. The Cut Looks Terrible
Why It Happens: Wrong Feeds, Speeds, or Tool
Wrong feeds and speeds, a dull tool, or too deep a cut. Beginners often push the machine too hard or use feeds and speeds from a different material.
The Fix: Start Conservative, Adjust by Sound
Start with conservative parameters. For a 6mm end mill in aluminum use 8000 RPM, 400 mm/min feed, and 0.5mm depth of cut per pass. Adjust based on the sound and appearance of the cut. A smooth cutting sound with clean chips indicates good parameters.
If the surface finish is rough, reduce the feed rate by 20 percent. If the tool is squealing, reduce the spindle speed by 10 percent. If the material is burning, reduce RPM or increase feed.
3. The Workpiece Moves Mid-Cut
Why It Happens: Insufficient Clamping
Not enough clamping force, or the cutting forces push the workpiece out of position. Beginners often underestimate the forces involved in machining.
The Fix: More Clamps, Better Positioning
Use more clamps or stronger workholding. If you can push the workpiece by hand, the cutting forces will move it too. For small parts, use a vise instead of double-sided tape. For larger parts, add clamps on all four sides.
Position clamps as close to the cutting area as possible. The further a clamp is from the cut, the more leverage the cutting forces have to move the workpiece.
4. The Machine Stops Halfway
Why It Happens: Lost Steps or Connection Issues
The controller lost communication with the computer, a limit switch was triggered, or the stepper motors lost steps. This is frustrating because the part is usually ruined.
The Fix: Slow Down and Use Wired Connection
Slow down your acceleration and speed settings by 30 percent to prevent lost steps. Check that your toolpath does not travel outside the machine work area. Use a wired connection instead of WiFi to prevent communication drops.
If the machine stops at the same point every time, there is likely a limit switch issue or the toolpath exceeds the machine travel limits.
5. The Finished Part Doesn’t Fit
Why It Happens: Wrong Tool Compensation
Tool diameter compensation was not set, or the wrong tool was selected in CAM. The actual tool diameter is often slightly different from the nominal size.
The Fix: Measure Tools, Use G41/G42
Measure your actual tool diameter with calipers before entering it into CAM. A 6mm end mill may actually be 5.95mm. That 0.05mm difference adds up on multiple passes.
Use G41/G42 cutter compensation for precision work. Always run a test piece in scrap material first and measure the results before cutting the final workpiece.
Five Failure Modes at a Glance
The Five Problems and Their Fixes
Here is a summary of the five problems, their root causes, and the primary fix for each:
| Problem | Root Cause | Primary Fix |
|---|---|---|
| Tool crashes | Wrong Z-zero or G00 plunge | Paper feeler gauge + dry run |
Prevention Checklist
Use the table above as a quick reference when setting up your next job. Identify which failure mode you are most likely to encounter based on the part you are cutting, then check that specific fix before running the program. Over time, referring to this table builds intuition for what can go wrong and how to prevent it. | Bad surface finish | Wrong feeds/speeds or dull tool | Start conservative, adjust by sound | | Workpiece moves | Insufficient clamping | More clamps near cutting area | | Machine stops | Lost steps or connection drop | Reduce speed, use wired connection | | Part doesn’t fit | Wrong tool compensation | Measure tools, use G41/G42 |
Preventing All Five Problems
Simulation Catches Everything
The single most effective way to prevent all five problems is simulation. Run every new program in a G-code simulator or CAM simulation before touching material. Simulation reveals:
- Tool crashes (problem 1)
- Wrong feed rates (problem 2)
- Interference with clamps (problem 3)
- Exceeding machine limits (problem 4)
- Wrong tool sizes (problem 5)
Simulation takes a few minutes and prevents hours of troubleshooting.
Build a Prevention Mindset
Beyond simulation, develop these habits to minimize failures:
- Always dry run. Run the program with Z raised before cutting. Watch the toolpath for unexpected moves.
- Check the work offset. Verify G54 points to the correct position before every job.
- Measure before cutting. Confirm tool diameter, work offset, and material thickness match your program.
- Start conservatively. Use lower feeds and shallower cuts than you think you need. Increase as you gain confidence.
- Learn from failure. When a part fails, figure out why and fix the cause before running another.
Every failure is a learning opportunity. The best CNC machinists are not the ones who never fail — they are the ones who learn from every failure and improve their process.
Real Stories from Beginners
Story 1: The Z-Offset Mistake
A beginner set his work offset by touching the tool to the top of a 20mm thick piece of aluminum and pressing Zero Z. He programmed the first cut at Z‑2. The tool plunged 22mm into the material — 2mm for the cut plus 20mm of offset error.
Why it happened: He touched the tool to the table surface instead of the top of the material. The machine had no way of knowing the material was 20mm thick.
How to avoid: Always verify the Z position by jogging the tool to the material surface after setting the offset. Watch the Z coordinate reading on the screen. It should read Z0 at the material surface.
Story 2: The Wrong Tool CAM Mistake
A programmer selected a 6mm end mill in CAM but loaded a 3mm end mill in the machine. The program cut 6mm wide slots with a 3mm tool, taking three passes per slot instead of one. The extra passes caused the tool to overheat and break.
Why it happened: The CAM tool library was not synced with the physical tool setup.
How to avoid: Verify that the tool number in the program matches the tool in the machine before running. Create a tool setup sheet that lists which tool is in each position.
Story 3: The Clamp Crash
A machinist set up clamps around the perimeter of a part and started the program. The toolpath came within 5mm of a clamp on the first pass. On the second pass, deflection caused the tool to hit the clamp, shattering the end mill.
Why it happened: The CAM simulation showed the toolpath but the operator did not include the clamp models in the simulation.
How to avoid: Include clamp and fixture models in your CAM simulation. If that is not possible, add extra clearance in the program and verify manually.
Story 4: Speeds and Feeds from YouTube
A beginner watched a YouTube video of someone cutting aluminum at 20000 RPM and 2000 mm/min feed rate. He tried the same settings on his 3018 desktop router. The tool broke on the first pass.
Why it happened: The YouTube machinist was using an industrial machine with flood coolant and a rigid frame. The desktop router had none of these advantages.
How to avoid: Use feeds and speeds appropriate for your specific machine, not what someone else uses on a different machine. Start with conservative values and adjust based on your results.
Troubleshooting Your Failed Projects
The Diagnostic Sequence
When a project fails, work through this diagnostic sequence:
- What exactly went wrong? (Crash, bad finish, wrong size, machine stop)
- What was the root cause? (Wrong offset, wrong tool, wrong parameter)
- What can be changed to prevent it? (Better setup, simulation, verification)
- Implement the fix and try again
Document Your Failures
Document your failures and fixes in a log. Reviewing the log before starting new projects prevents repeating the same mistakes.
Building a Prevention System
Checklists and Systems
The most successful CNC machinists do not rely on memory alone. They build systems that prevent mistakes:
- Checklist. Before every job, run through a written checklist of setup steps
- Simulation. Every program runs in simulation before touching material
- Tool sheet. A printed list matching tool numbers to actual tools
- Offset verification. Double-checking the work offset before cutting
- First part inspection. Measuring every critical dimension on the first part
These systems take time to implement but save far more time by preventing failures.
The Right Mindset
Every CNC failure is a learning opportunity. The machinists who improve the fastest are not the ones who never fail — they are the ones who analyze their failures systematically and adjust their process to prevent recurrence.
When a project fails, do not get discouraged. Figure out what went wrong, fix the root cause, and try again. Each failure brings you closer to mastery.
Project Planning Checklist
The Pre-Job Checklist
Before starting any CNC project, go through this checklist to identify potential failure points:
☐ Work offset set and verified
☐ Tool diameter measured and entered in CAM
☐ Feeds and speeds appropriate for material
☐ Depth of cut appropriate for machine rigidity
☐ Workholding sufficient for cutting forces
☐ Toolpath simulated with no collisions
☐ Machine limits not exceeded
☐ Dry run completed
Each item on this checklist addresses one of the five common failure modes.
How to Use the Checklist
Print this checklist and keep it at your machine. Check off each item before pressing Cycle Start. Over time, the checklist becomes a mental habit. Even experienced machinists use written checklists for critical jobs because memory is unreliable under pressure.
Recommended First Projects
Progressive Skill Building
If you are not sure where to start, these projects build skills progressively without overwhelming complexity:
Five Starter Projects
Project 1: Square pocket (30 minutes) — Cut a 50mm square pocket 1mm deep in scrap wood. Teaches G00/G01, work offsets, and basic program structure.
Project 2: Nameplate (1 hour) — Engrave text into an acrylic plate. Teaches V-carve toolpaths and CAM workflow.
Project 3: Bolt hole circle (1 hour) — Drill six holes in a circular pattern on an aluminum plate. Teaches G81 drilling cycle and tool changes.
Project 4: Curved contour (1.5 hours) — Cut a profile with radiused corners. Teaches G02/G03 circular interpolation.
Project 5: Dovetail joint (2 hours) — Machine interlocking parts. Teaches precision machining and fit tolerances.
Each project is designed to introduce one new skill while practicing skills from previous projects.
Resources for Troubleshooting
Where to Find Help
When your project fails and you need help diagnosing the problem:
- CNC forums: Practical Machinist, CNCzone, Reddit r/CNC
- YouTube: Search for your specific machine and problem
- Manufacturer support: Check the documentation for your machine and software
- G-code simulators: Visualize what your program actually does
How to Get Good Answers
The CNC community is generally helpful. Include your machine model, controller type, material, and the exact error or symptom when asking for help. A clear description gets you useful answers faster.
Building a Reliable Process
The Prove-Out Process
The key to CNC success is not avoiding all mistakes but building a process that catches them before they cause damage. Professional machine shops use structured processes to ensure every program runs correctly the first time.
Before any program goes into production, it goes through a prove-out process:
- CAM simulation. Verify the toolpath in CAM software. Check for collisions, exceeded limits, and correct tool selection.
- G-code simulation. Run the posted G-code through a standalone simulator like NCViewer. CAM simulation and G-code simulation can show different results because the post-processor may change the code.
- Dry run on machine. Load the program and run it with Z raised 50mm above the part. Watch the toolpath for unexpected moves or positions that seem wrong.
- Single-block first part. Run the first part one line at a time. Check each move before pressing Cycle Start.
- Inspect the first part. Measure every critical dimension on the first part. Compare to the print or model.
- Adjust and repeat. If the first part has issues, fix them and run another prove-out.
The 10-Minute Setup Routine
Before starting any job, spend 10 minutes on this setup routine:
☐ Material dimensions match CAM stock size
☐ Work offset set and verified
☐ Tool diameters measured and match CAM
☐ Tools loaded in correct positions
☐ Feeds and speeds appropriate for material
☐ Coolant level adequate
☐ Clamps secure and clear of toolpath
☐ Dry run completed
☐ Emergency stop within reach
This routine takes 10 minutes and prevents the five most common failure modes.
Documentation
Keep a log of every job you run. Include:
- Part name and date
- Feeds, speeds, depth of cut, and stepover used
- Tool type and diameter
- Material type and thickness
- Any issues encountered and how they were resolved
Over time, this log becomes your most valuable reference. When you encounter a problem with a new job, check the log for similar situations and solutions.
Additional Resources
Related Guides
For more detailed guidance on specific aspects of CNC machining:
- CNC Troubleshooting Guide — systematic diagnosis of machine problems
- Feeds and Speeds Guide — calculating optimal cutting parameters
- How to Set Work Offsets — precise work coordinate setup
- Beginner CNC Projects — step-by-step project instructions
Final Thoughts
The five failure modes in this guide account for 90 percent of beginner CNC problems. Every one of them is preventable with proper setup and verification. The experienced machinists are not the ones who never see these problems — they are the ones who have developed systems to catch them before they cause damage.
Take the time to set up correctly. Run simulations. Check your work before cutting. These habits will save you time, money, and frustration in the long run.
Every CNC machinist started as a beginner who made mistakes. The difference between those who succeed and those who give up is not talent — it is persistence and a willingness to learn from failure. Apply the techniques in this guide, develop good habits, and you will quickly progress from failing projects to successful ones.
Success in CNC machining comes from developing a systematic approach to every job. Set up correctly, simulate thoroughly, verify before cutting, and learn from every outcome.
 CNC Part Finishing and Deburring Guide: Methods, Tools, and Best PracticesJune 27, 2026 · Guides
 CNC Toolpath Troubleshooting Guide: Fix Bad Cuts and Improve Surface FinishJune 27, 2026 · Guides
 CNC Diagnostic Test Cuts: A Beginner's Guide to Machine CalibrationJune 27, 2026 · Guides
 CNC Sign Making Guide for Beginners: From Design to Finished SignJune 27, 2026 · Guides